

Class Registration: Registration Plans
Purpose: This guide shows how to use the Plan Ahead tool to create, edit, and register for classes using Registration Plans in RamPortal. Students can create and save up to three plans to use when their registration window opens.
| Contents |
|---|
| Before You Begin |
| Navigation |
| Build a Plan |
| Remove a Course from Your Plan |
| Register Using a Plan |
| Related Guides |
Before You Begin
Complete the Financial Terms and Conditions Agreement
Before you can register for classes, you must review and accept the Financial Terms and Conditions Agreement. If you have not completed the agreement, the Register for Classes card will display a Financial Terms & Conditions button instead of your registration information (Fig. 1).
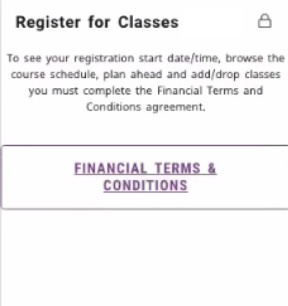
Fig. 1
Note: After you accept the agreement, the card will update to display the Register button and your Registration Date/Time (Fig. 2). If the card does not update after a few moments, refresh your browser by clicking on your browser’s refresh button .
Visit Financial Terms and Conditions: How to View and Accept for additional instructions.
Navigation
- Login to RamPortal using your WCU Single Sign On (SSO).
- Locate the Register for Classes card on your home page (Fig. 2). For help with finding cards, visit Home Page Navigation: A Guide to the RamPortal Home Page .
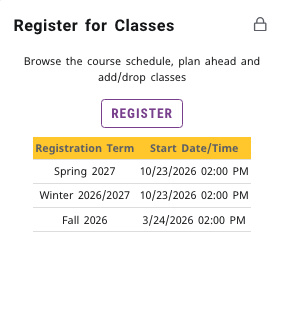
Fig. 2 - Select the Register Button.
- On the next screen, choose Plan Ahead.
- Select the term from the dropdown and click Continue.
Build a Plan
- Select Create a New Plan.
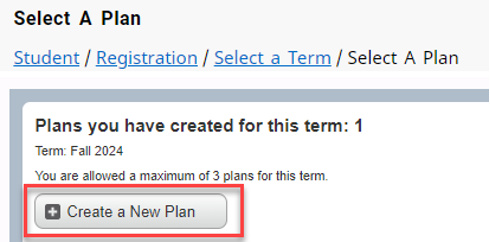
Fig. 3: Create a New Plan Button - The Plan Ahead page will load with three panels: Find Classes (top), Schedule (bottom right), and Plan (bottom left) panel. TIP: If you don’t see all three panels, use the divider lines or the Panel button to adjust your view.
- Use the Find Classes panel to search for classes (Fig. 4). Enter one or more criteria, like Subject, Course, Number, or Attribute, to narrow your results. Use Advanced Search to filter by details such as Meeting Days and Time or Instructor.
- Click Search.
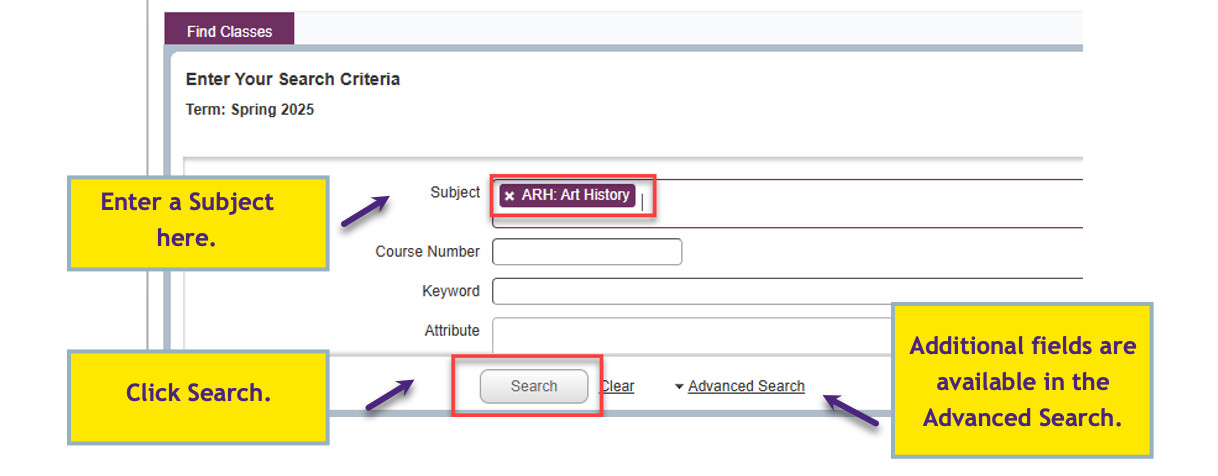
Fig. 4: Find Classes Panel used to search for classes. - The Search Results will load. Select View Sections (Fig. 5) to see available options.
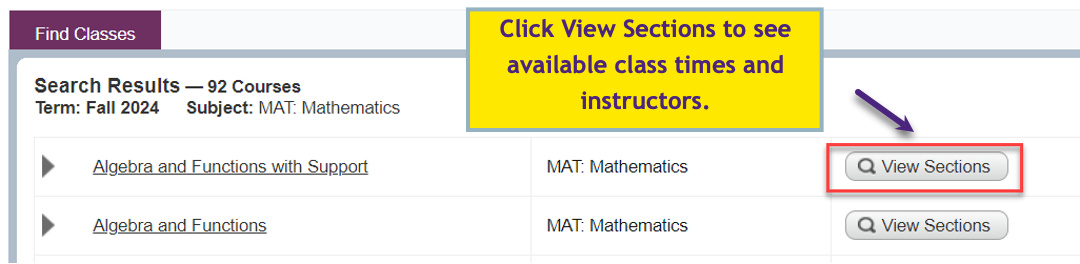
Fig. 5: Search Results window with View Sections button. - Select the Add Course button for the class you want. It will appear as Pending in the Plan panel. Continue adding classes until your plan is complete.
- When finished, click Save Plan. Name your plan and then select Save again.
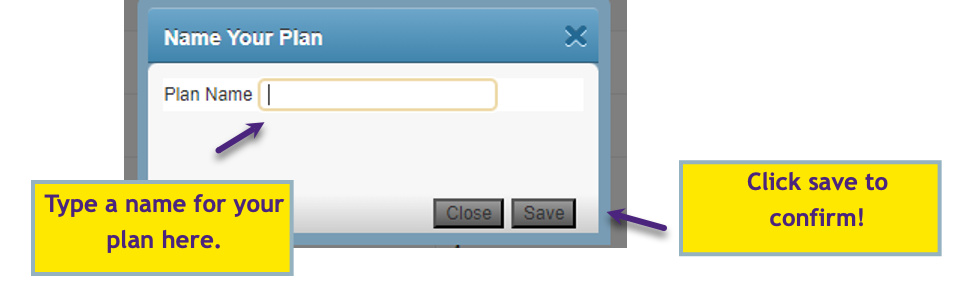
Fig. 6: Name Your Plan Screen - Your classes will now show a status of Planned.
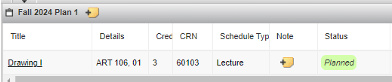
Fig. 7: Course Status showing Planned
Remove a Course from Your Plan
- In the Plan panel, locate the course you want to remove.
- From the Action dropdown menu, select Delete (Fig. 8).
- Click Save Plan to confirm changes.
- The course will be removed, and your updated plan will display.
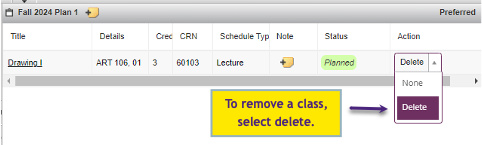
Fig. 8: Plan panel showing how to delete a class from your plan.
Register Using a Plan
- When your registration window opens, go to the Register for Classes card, select the Register button, and choose Register for Classes.
- Choose the correct term from the dropdown menu and click Continue.
- Select the Plans tab to view your saved plans.
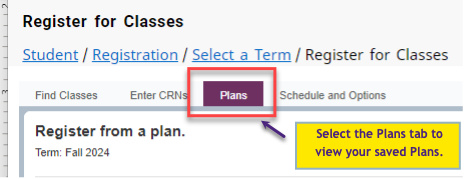
Fig. 9: Plans tab in Register for Classes. - Select Add All to register for the entire plan or Add to register for an individual course.
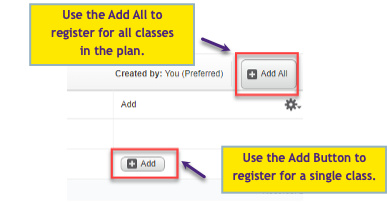
Fig. 10: Add All and Add button to register for classes from the plan. - Your selected classes will appear in the Schedule panel (left) and the Summary panel (right).
- Click Submit to complete the enrollment process.
- The status of your classes should update from Pending to Registered.
Related Guides
Related Guides can be found on the RamPortal Student Training Webpage:
For support, please submit a ticket at https://wcupaprod.service-now.com/aes
For support, please submit an AES Support Portal ticket.