
How to Initially Upload a Policy to the WCU Policy Library SharePoint
(not to be used for policies already in the policy library)
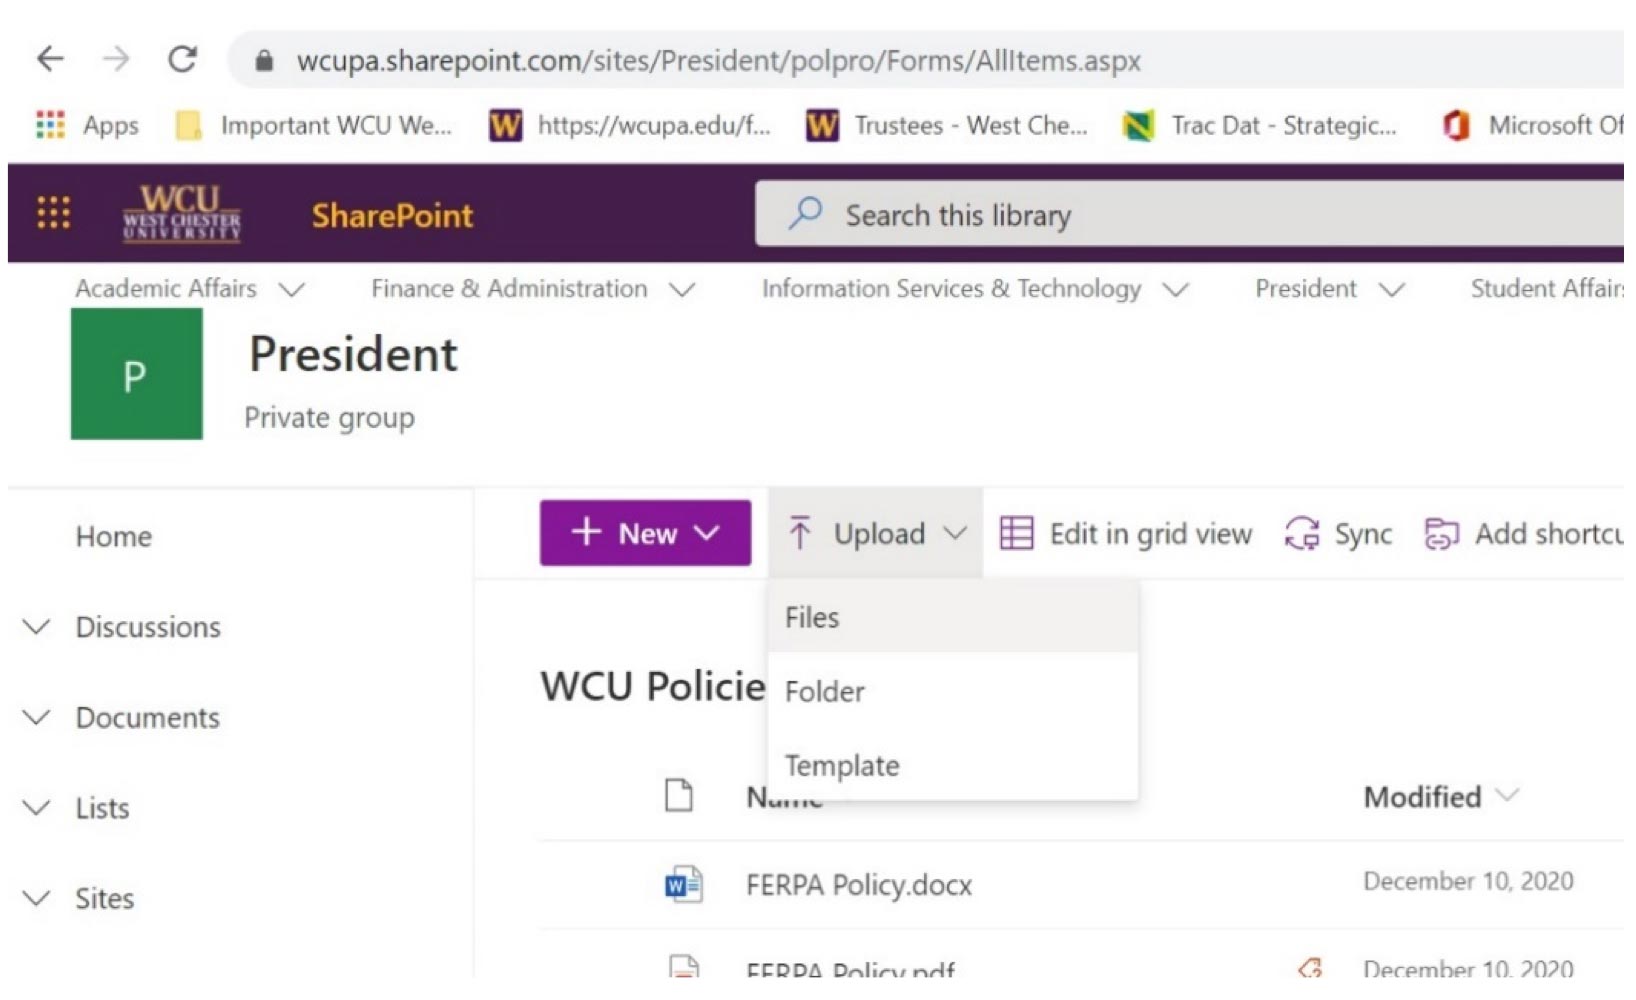
- Click Upload → Files and select the WORD version of the policy you wish to upload (YOU MUST UPLOAD THE VERSION SAVED TO YOUR HARD DRIVE (“THIS PC”) – DO NOT UPLOAD
FROM YOUR ONEDRIVE/TEAMS/OR OTHER DOCUMENT MANAGEMENT SYSTEM). Now the Policy will show in the Library.
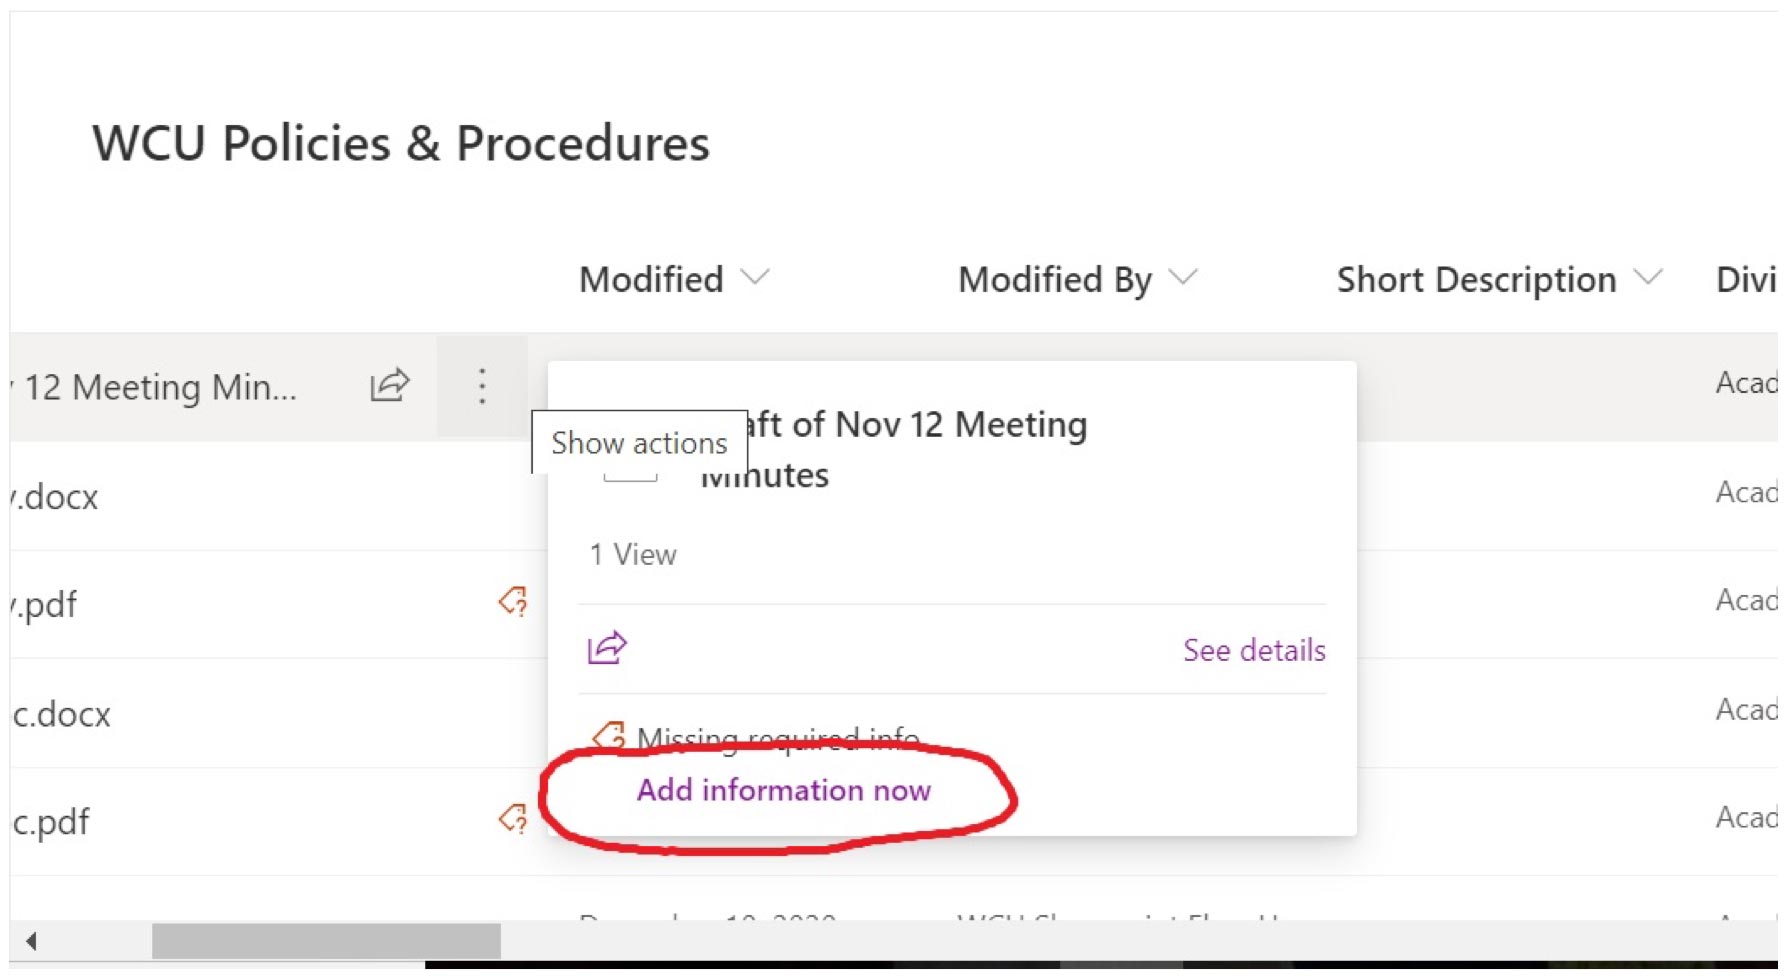
- Find the newly uploaded policy in the list. Hover over the 3 dots → Click “Add information
now” to complete the missing information.
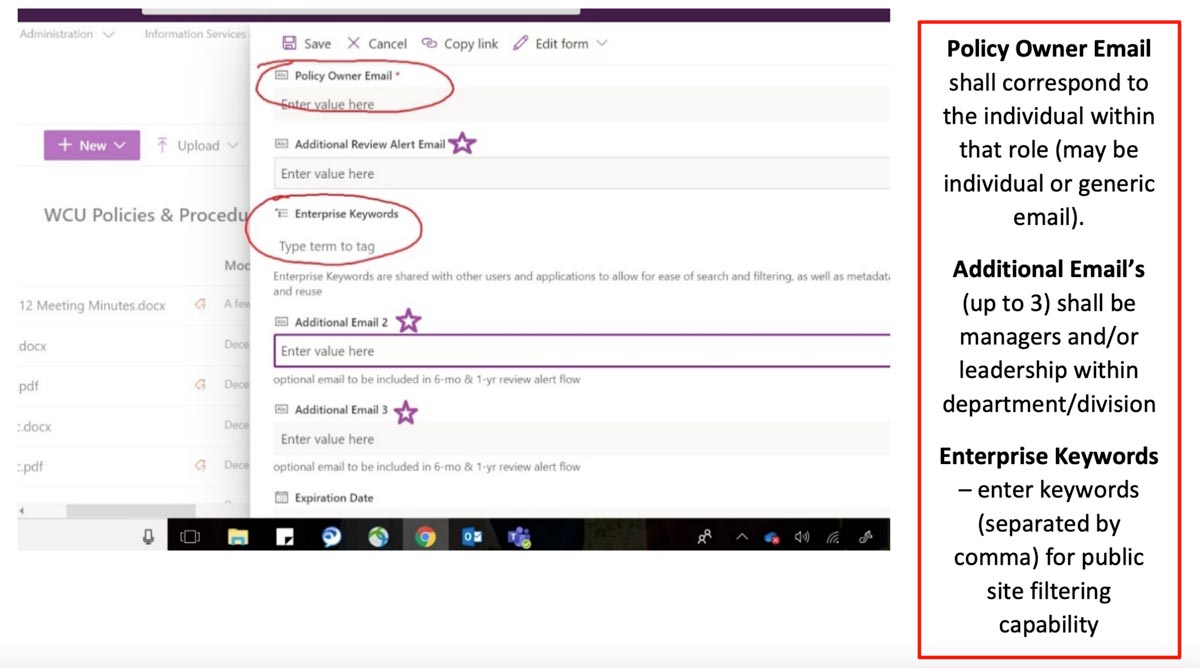
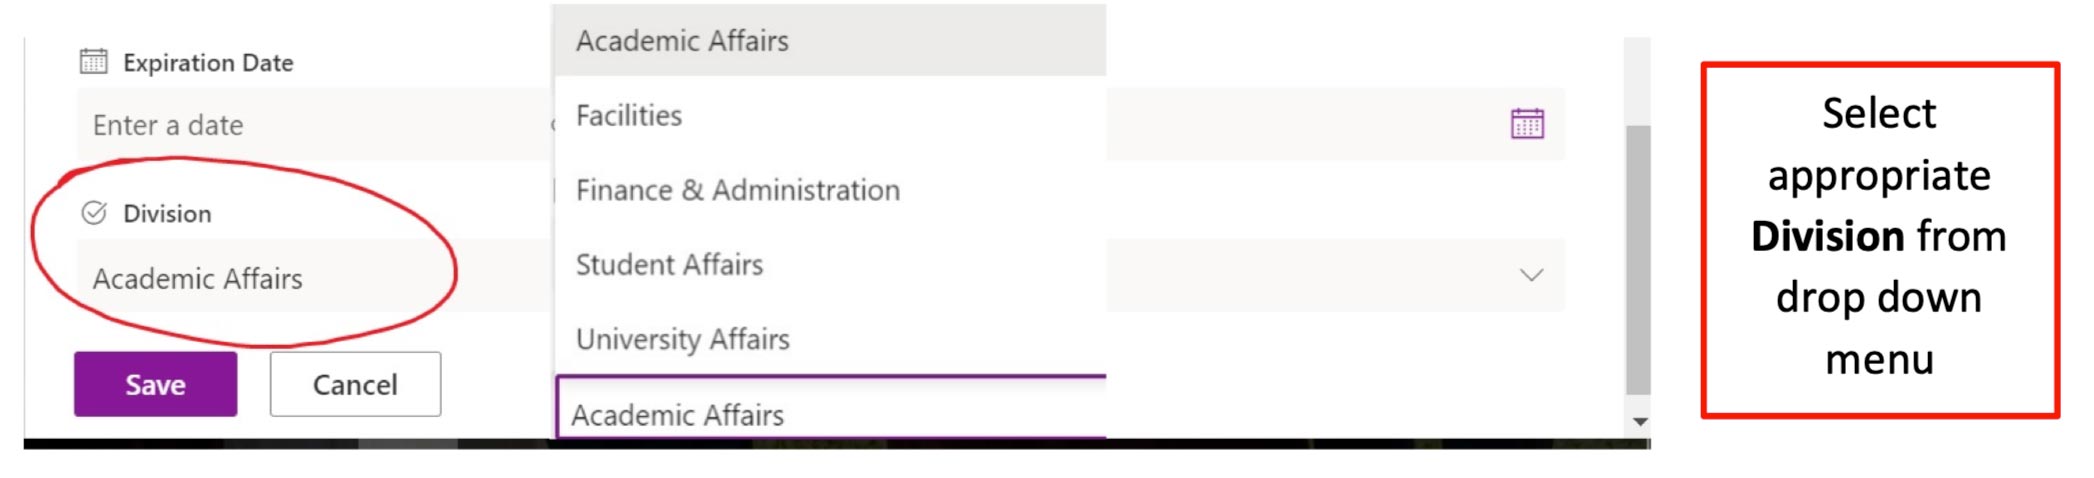
- Fill in all required boxes with appropriate information as illustrated in the following
images (see checklist below step 5):

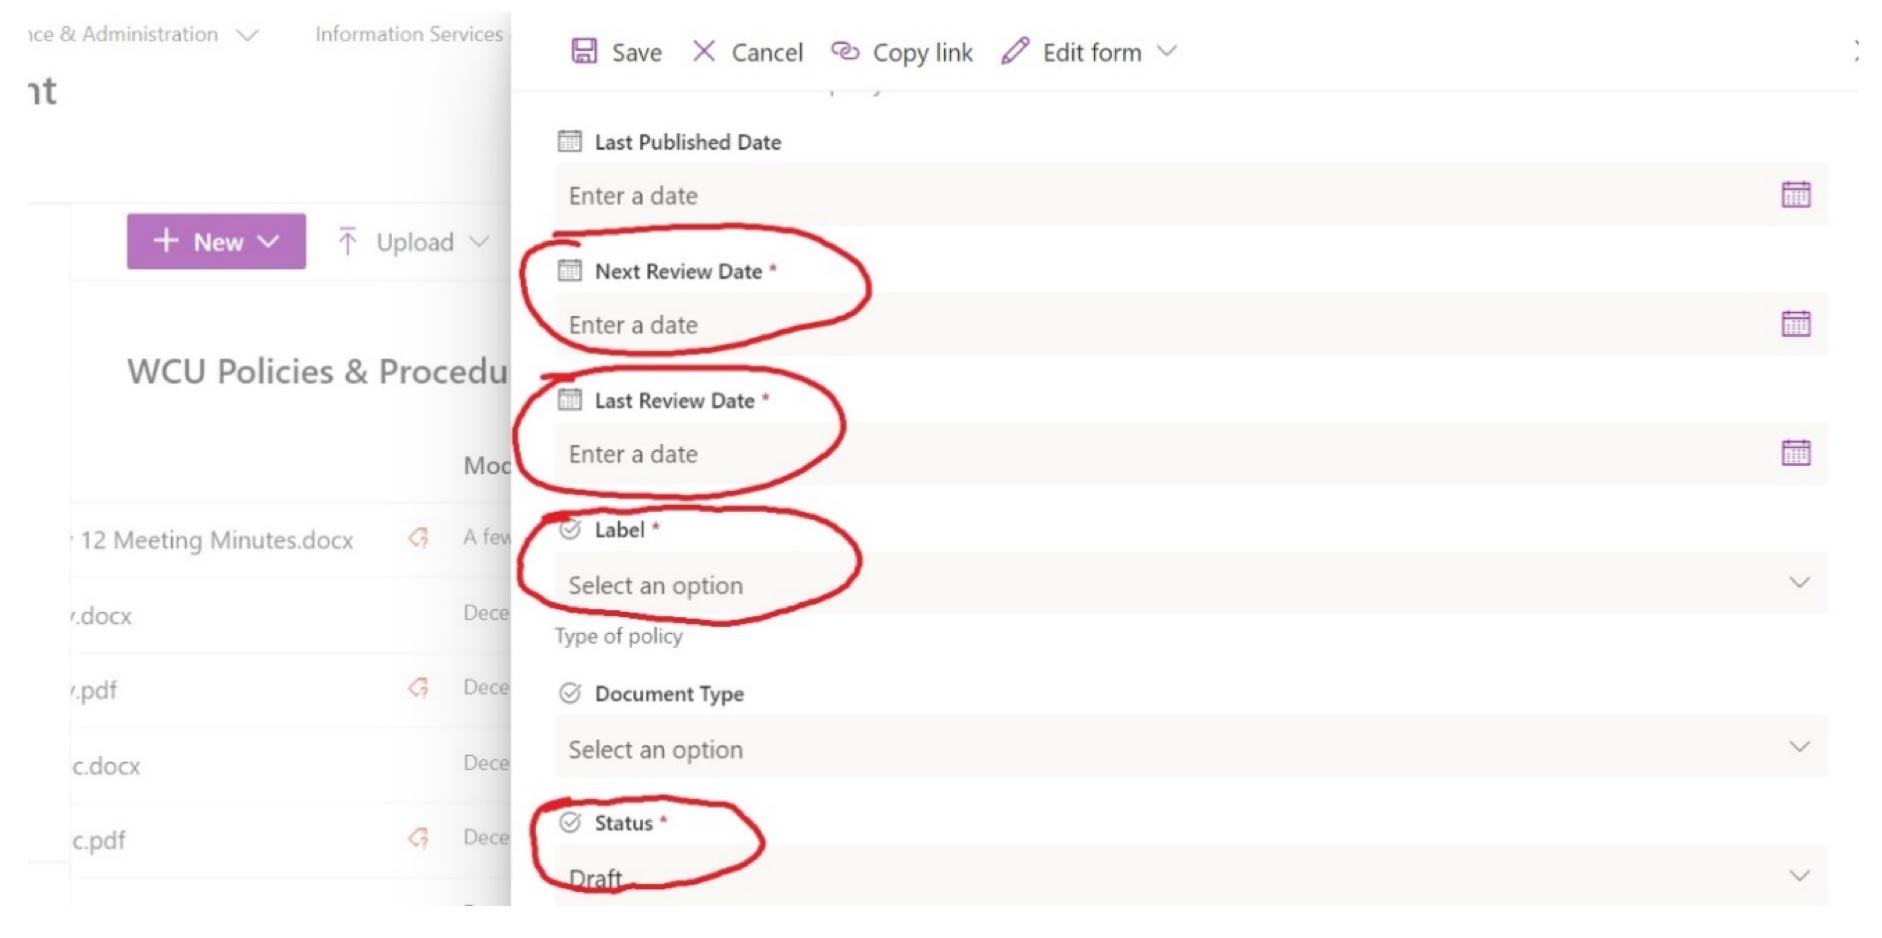
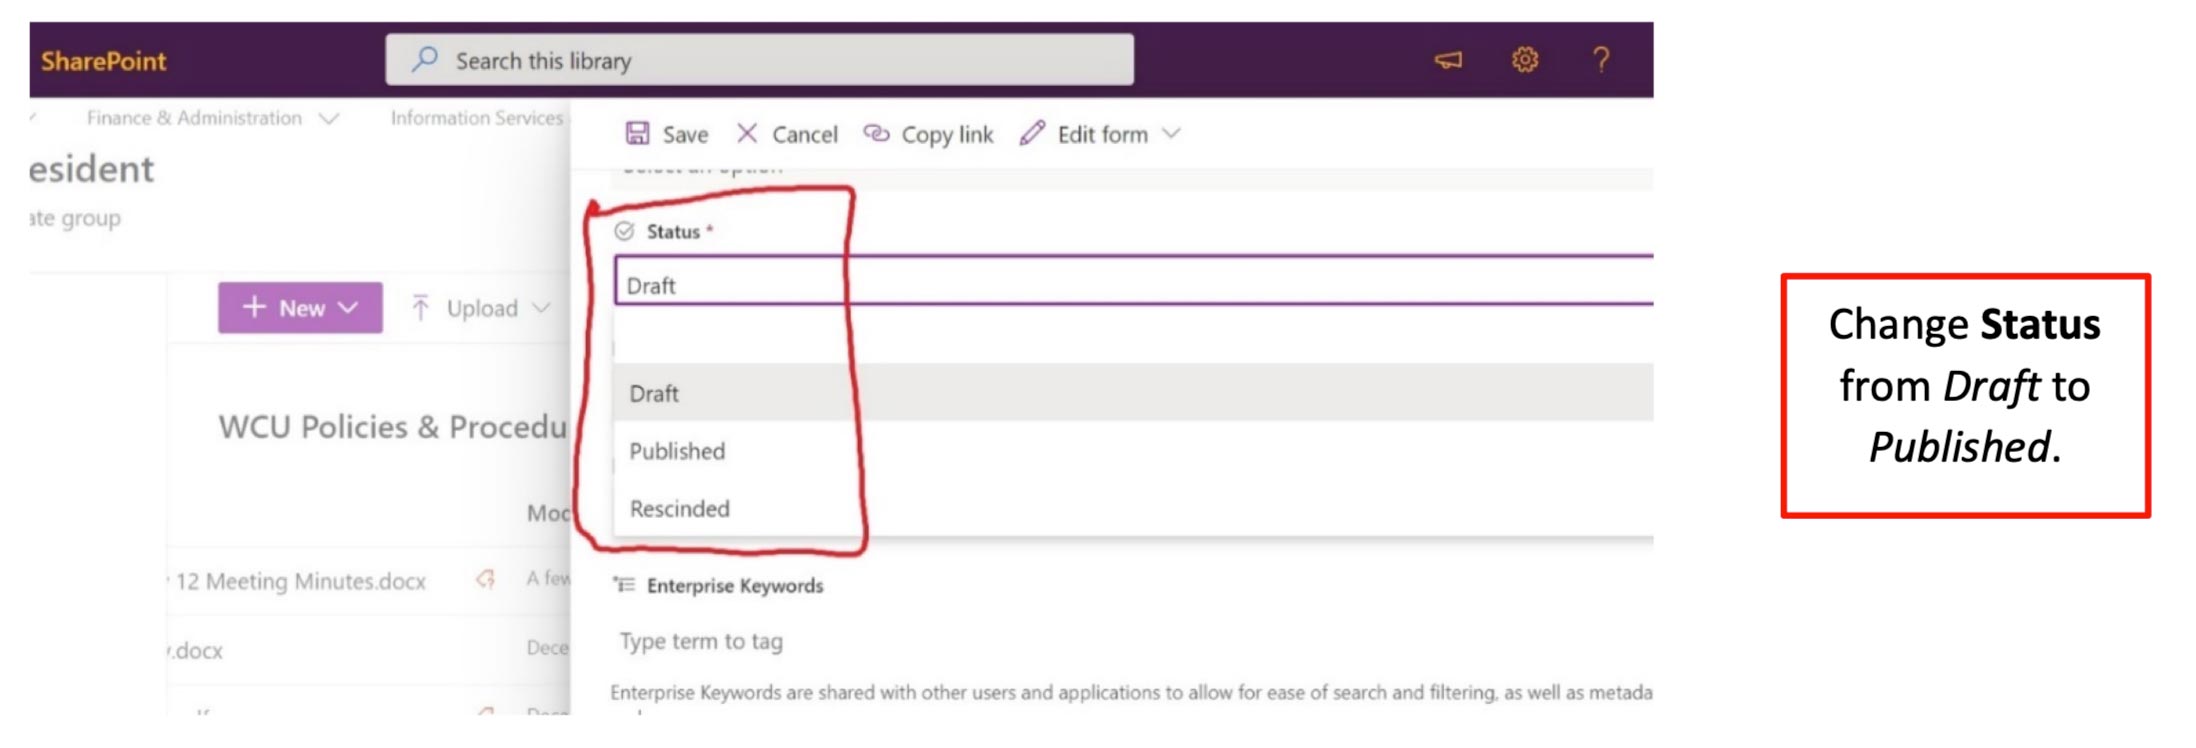
**See next 2 images for details regarding “Label” and “Status”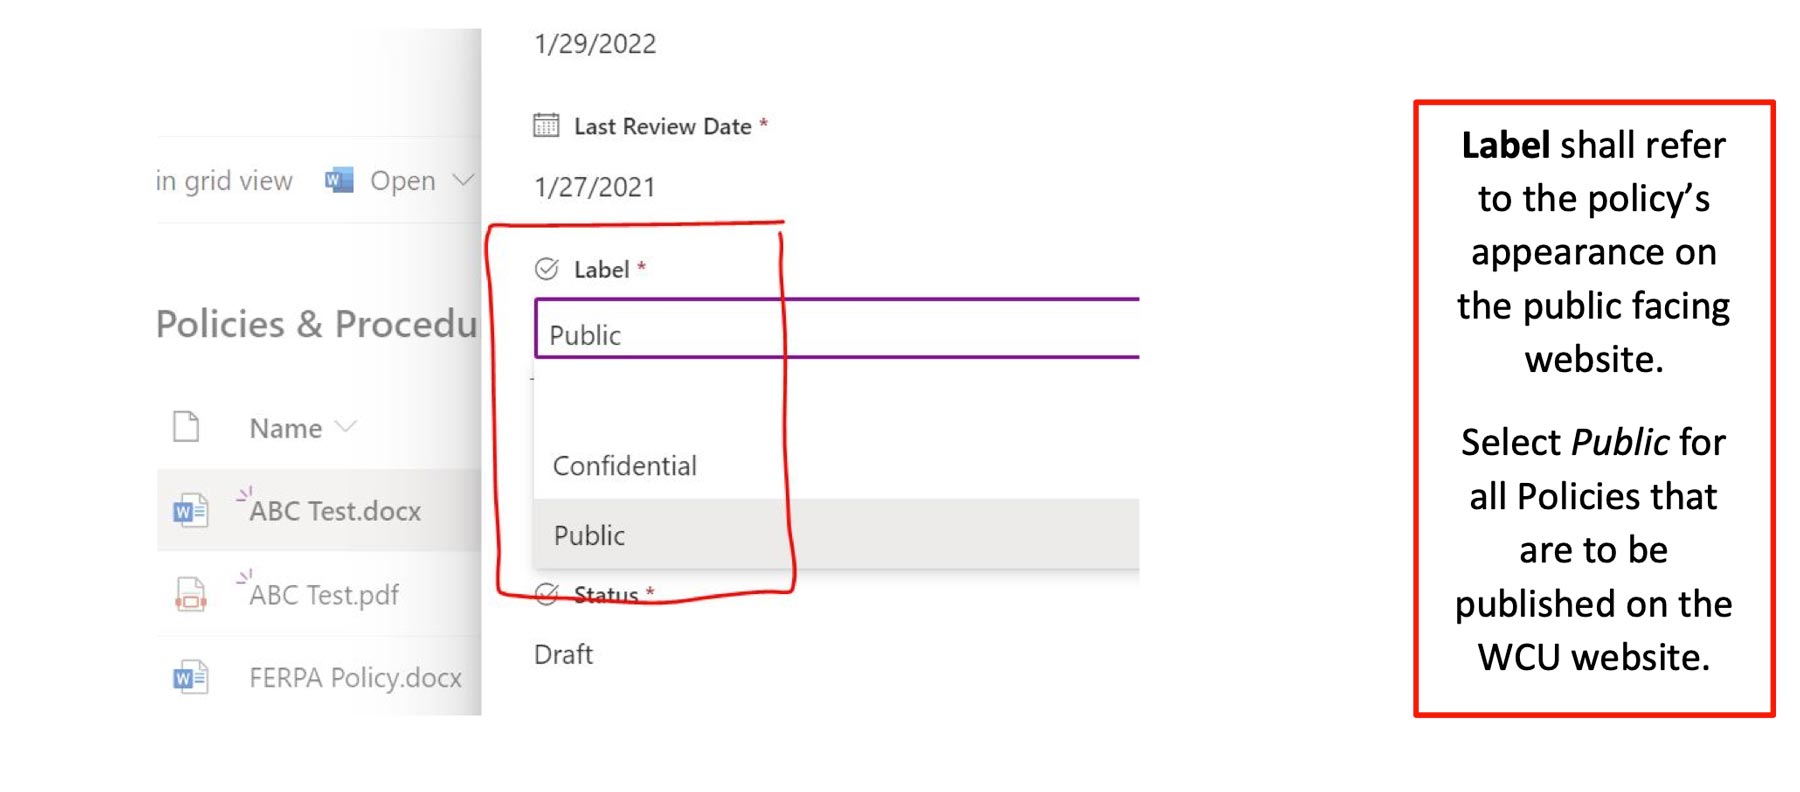
- Click Save
- Convert Document to PDF: The very first time this step is completed, you will need to connect to the Microsoft Flow. Once you have done that, you will not ever have to do it again and will complete
all future conversions as follows: Locate the policy on the main list. Click the 3 dots to right of the document name
→ Mouse over to “Automate” → Click “Convert Document to PDF”

*Checklist of Required Information to Complete in Step 3
All other boxes can be filled in to provide additional detail as user sees fit.