
Creating a Student List from another Resource
There are times when you have a list of student IDs from another resource that you
would like to utilize in Navigate to use Navigate's Communication tools. To accomplish
this, you will need to use the "List & Saved Searches"  feature in Navigate.
*Please note: this process creates a static student list and does not automatically update.
Getting Started
- Make sure your Excel file contains 1 column labeled Student ID.
- The list must be in .CSV format
- If the student ID starts with a number lower than 10, you need to add the leading zeros in a student IDs before uploading. Using the student ID that starts with "W0 will resolve any issues, and is recommended.
- Warning. The column containing student IDs in the CSV must be wide enough to display the entire student ID or the platform cannot read it.
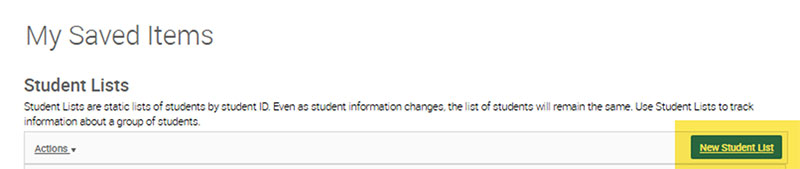
Login to Navigate
- Click on the List & Saved Searches Icon
- Click on New Student List (to create a new list)
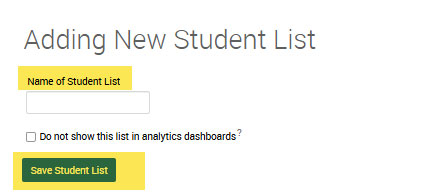
- Name student list and Save it.
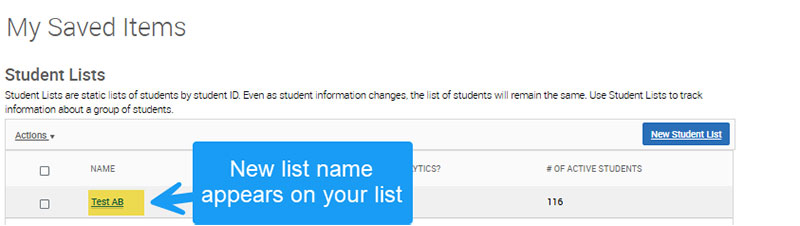
- A new window appears showing you your "new" student list in the List and Saved Searches.
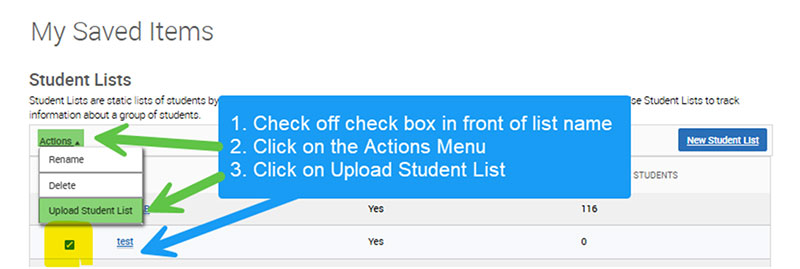
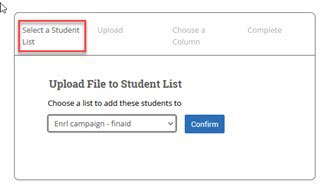
Uploaded File to Student List
- Choose a list to add the student IDs from the dropdown menu
- Click Confirm
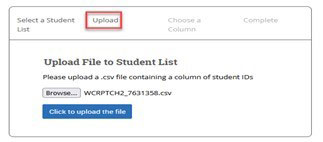
Browse and locate the file you want to upload. Click to upload the file.
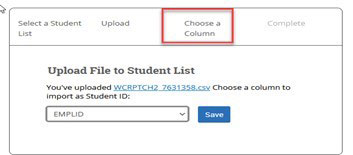
Choose the student ID column, click save.
A Success Message will appear when you have completed the upload.
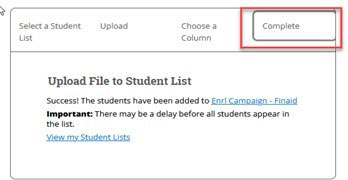
You can view the list in your Lists and Search page in Navigate.
Note: If the number of students does not match the original list, it may take 24 hours to complete the upload. If there are duplicate student IDs the system will automatically remove them.
For additional assistance contact Navigate@wcupa.edu.